> ## Documentation Index
> Fetch the complete documentation index at: https://superwhisper.com/docs/llms.txt
> Use this file to discover all available pages before exploring further.
# Essential Settings
> Configure keyboard shortcuts, push-to-talk, microphone input, and sound feedback.
## Open settings
There are four ways to access the Superwhisper settings:
1. Click the **Superwhisper icon in the menu bar** (near the Wi-Fi icon) and choose **Settings**
2. Right-click the **mini recording window** and choose **Open Settings**
3. Press **⌘ ,** while the app is active (requires "Show in Dock" in [advanced settings](/docs/get-started/settings-advanced#application))
4. Open the deep link `superwhisper://settings` from any launcher or automation
On Windows, click the Superwhisper icon in the system tray.
## Keyboard shortcuts
Open **Settings → Configuration**.
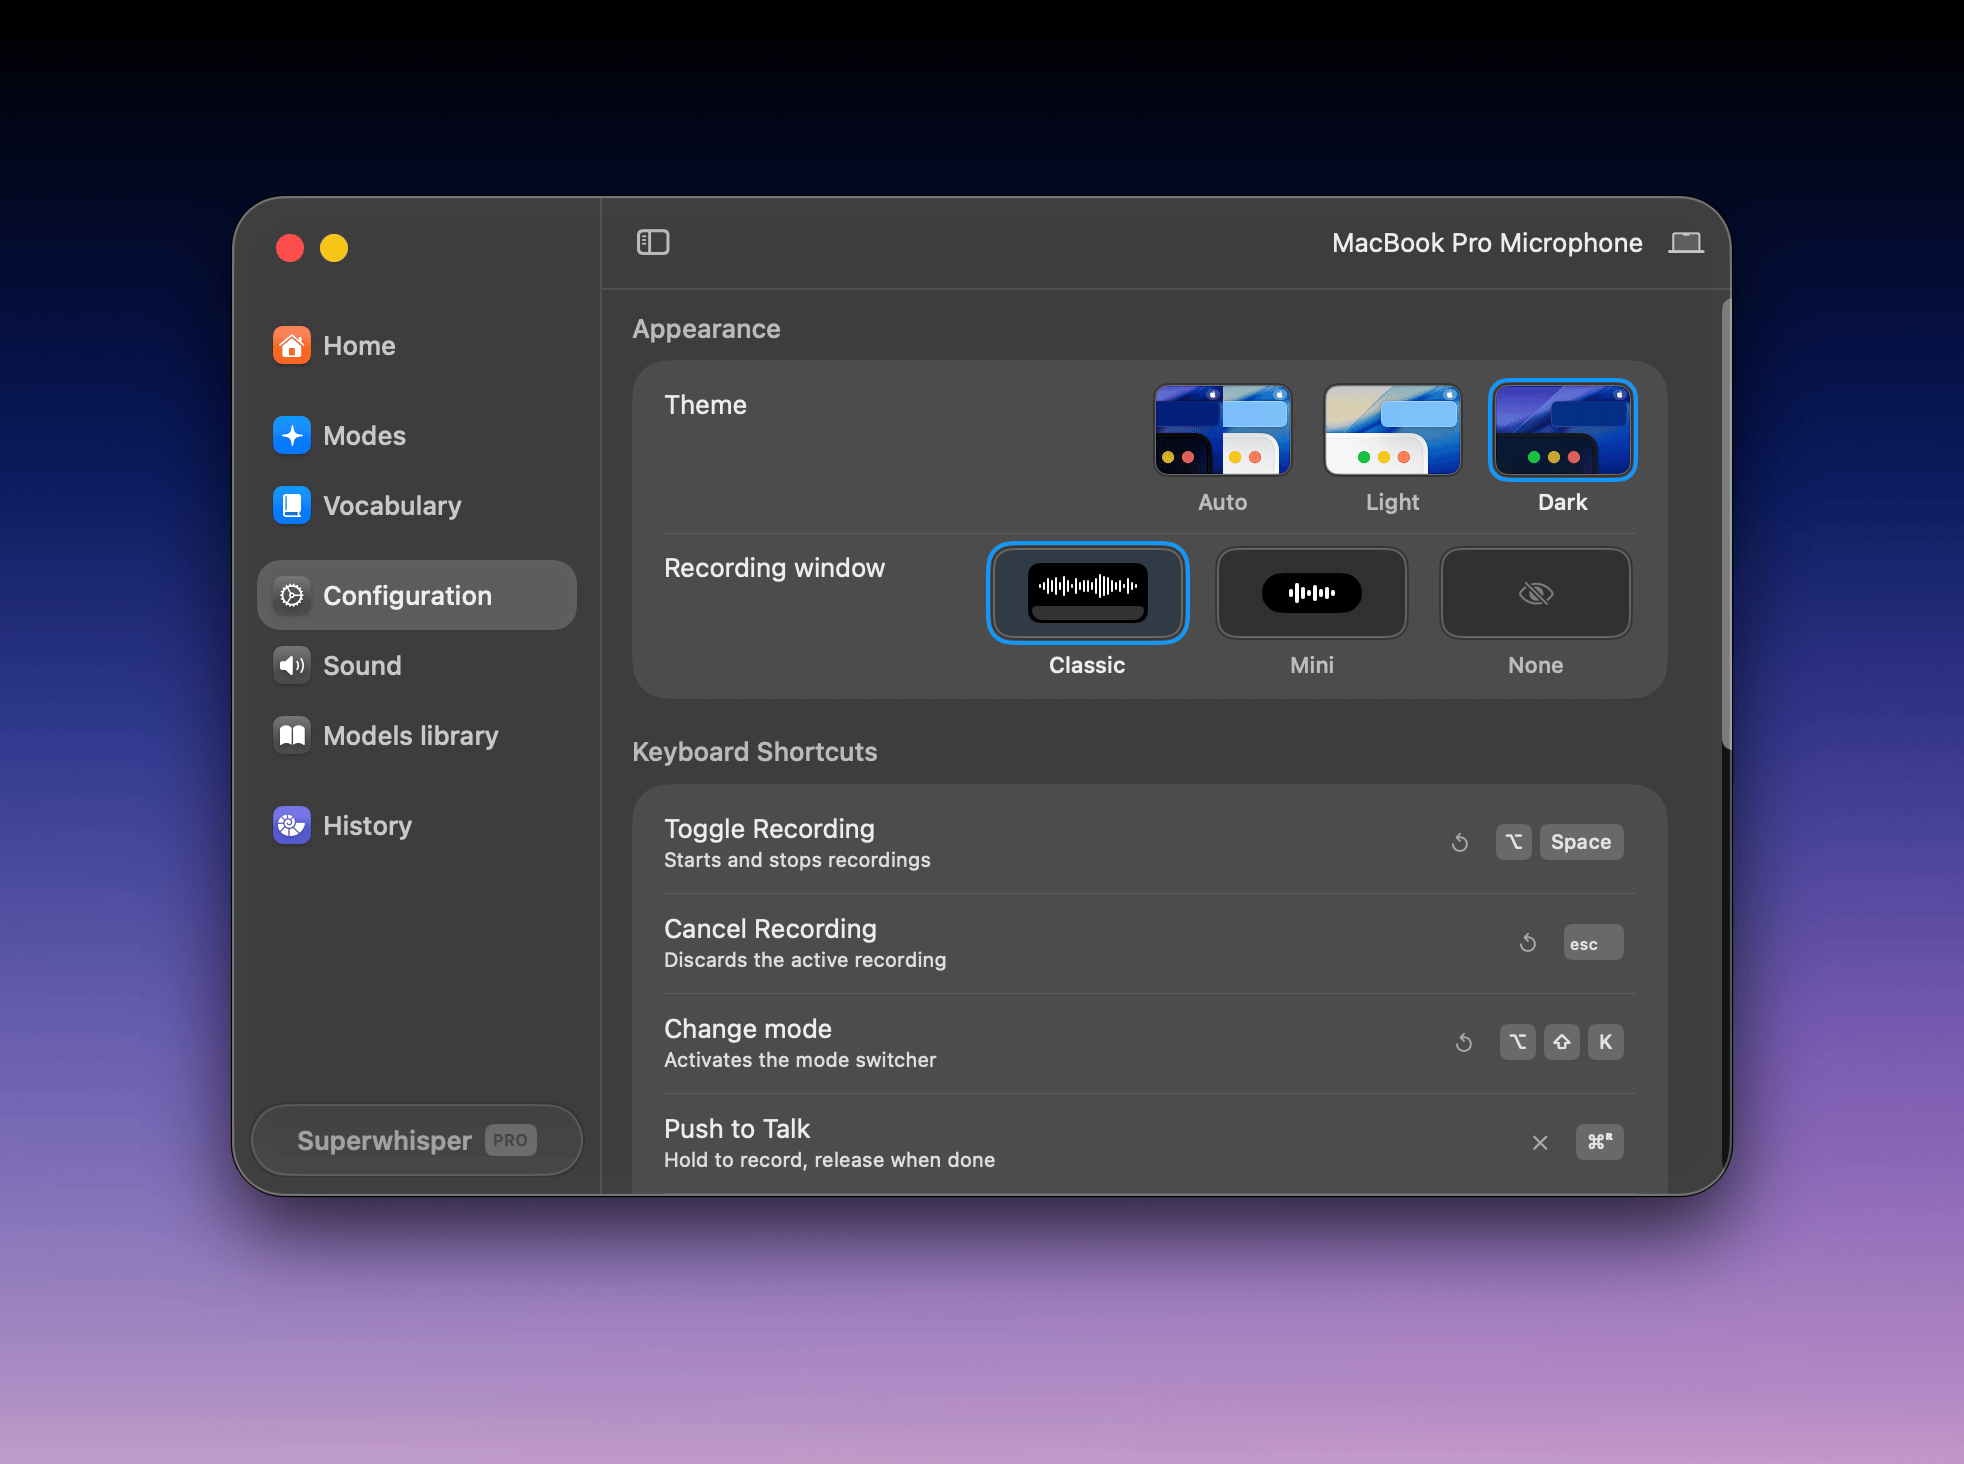 * **Toggle Recording**: Press to start/stop recording.
* **Push-to-Talk**: Press-and-hold to record, release to stop. A quick tap acts as toggle.
* **Cancel Recording**: Cancels the recording without transcribing. Cancels immediately for short recordings; longer recordings ask for confirmation.
* **Change Mode**: Press-and-hold to open the mode changer, then tap the key or use arrows to cycle through modes. Modes can be changed before or during a dictation.
* **Mouse Shortcut**: Assign a mouse button: quick click toggles, press-and-hold acts as push-to-talk. Note that some mice can't detect sustained holds.
**Global vs. mode-specific shortcuts.** The global shortcuts above start recording using the active mode. Separately, each mode has its own **Keyboard shortcut** that starts a recording in that specific mode. If a shortcut triggers the wrong mode, check whether it's assigned in both places.
## Application behavior
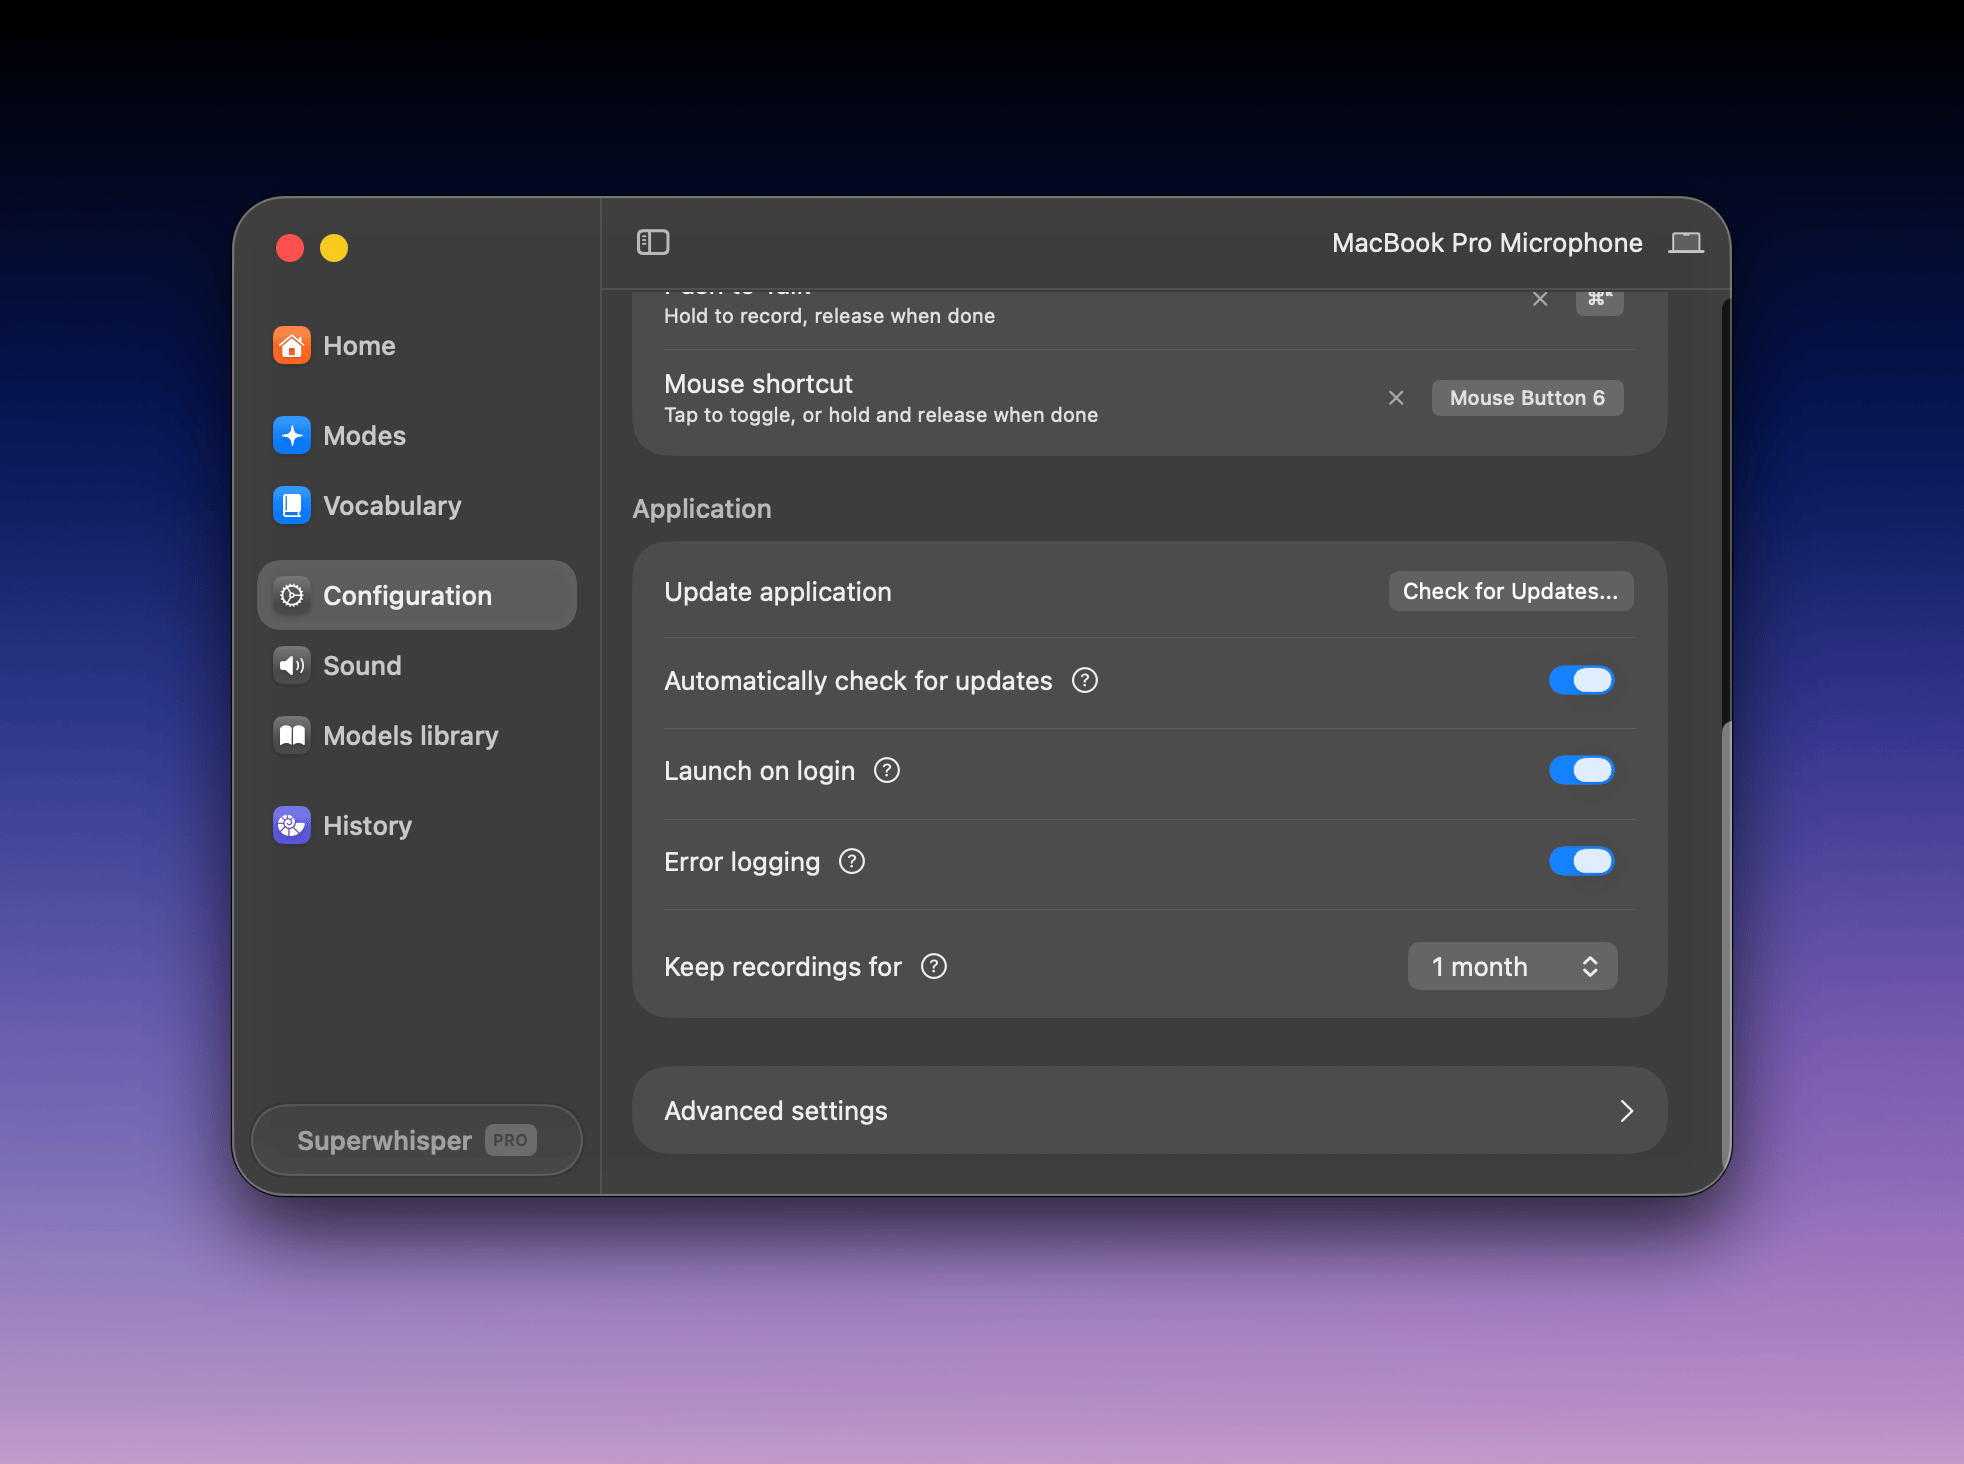
Scroll down in **Configuration** for update settings, launch on login, and error logging, which helps when you work with support.
* **Toggle Recording**: Press to start/stop recording.
* **Push-to-Talk**: Press-and-hold to record, release to stop. A quick tap acts as toggle.
* **Cancel Recording**: Cancels the recording without transcribing. Cancels immediately for short recordings; longer recordings ask for confirmation.
* **Change Mode**: Press-and-hold to open the mode changer, then tap the key or use arrows to cycle through modes. Modes can be changed before or during a dictation.
* **Mouse Shortcut**: Assign a mouse button: quick click toggles, press-and-hold acts as push-to-talk. Note that some mice can't detect sustained holds.
**Global vs. mode-specific shortcuts.** The global shortcuts above start recording using the active mode. Separately, each mode has its own **Keyboard shortcut** that starts a recording in that specific mode. If a shortcut triggers the wrong mode, check whether it's assigned in both places.
## Application behavior
Scroll down in **Configuration** for update settings, launch on login, and error logging, which helps when you work with support.
 ## Sound and microphone
Open **Settings → Sound**.
## Sound and microphone
Open **Settings → Sound**.
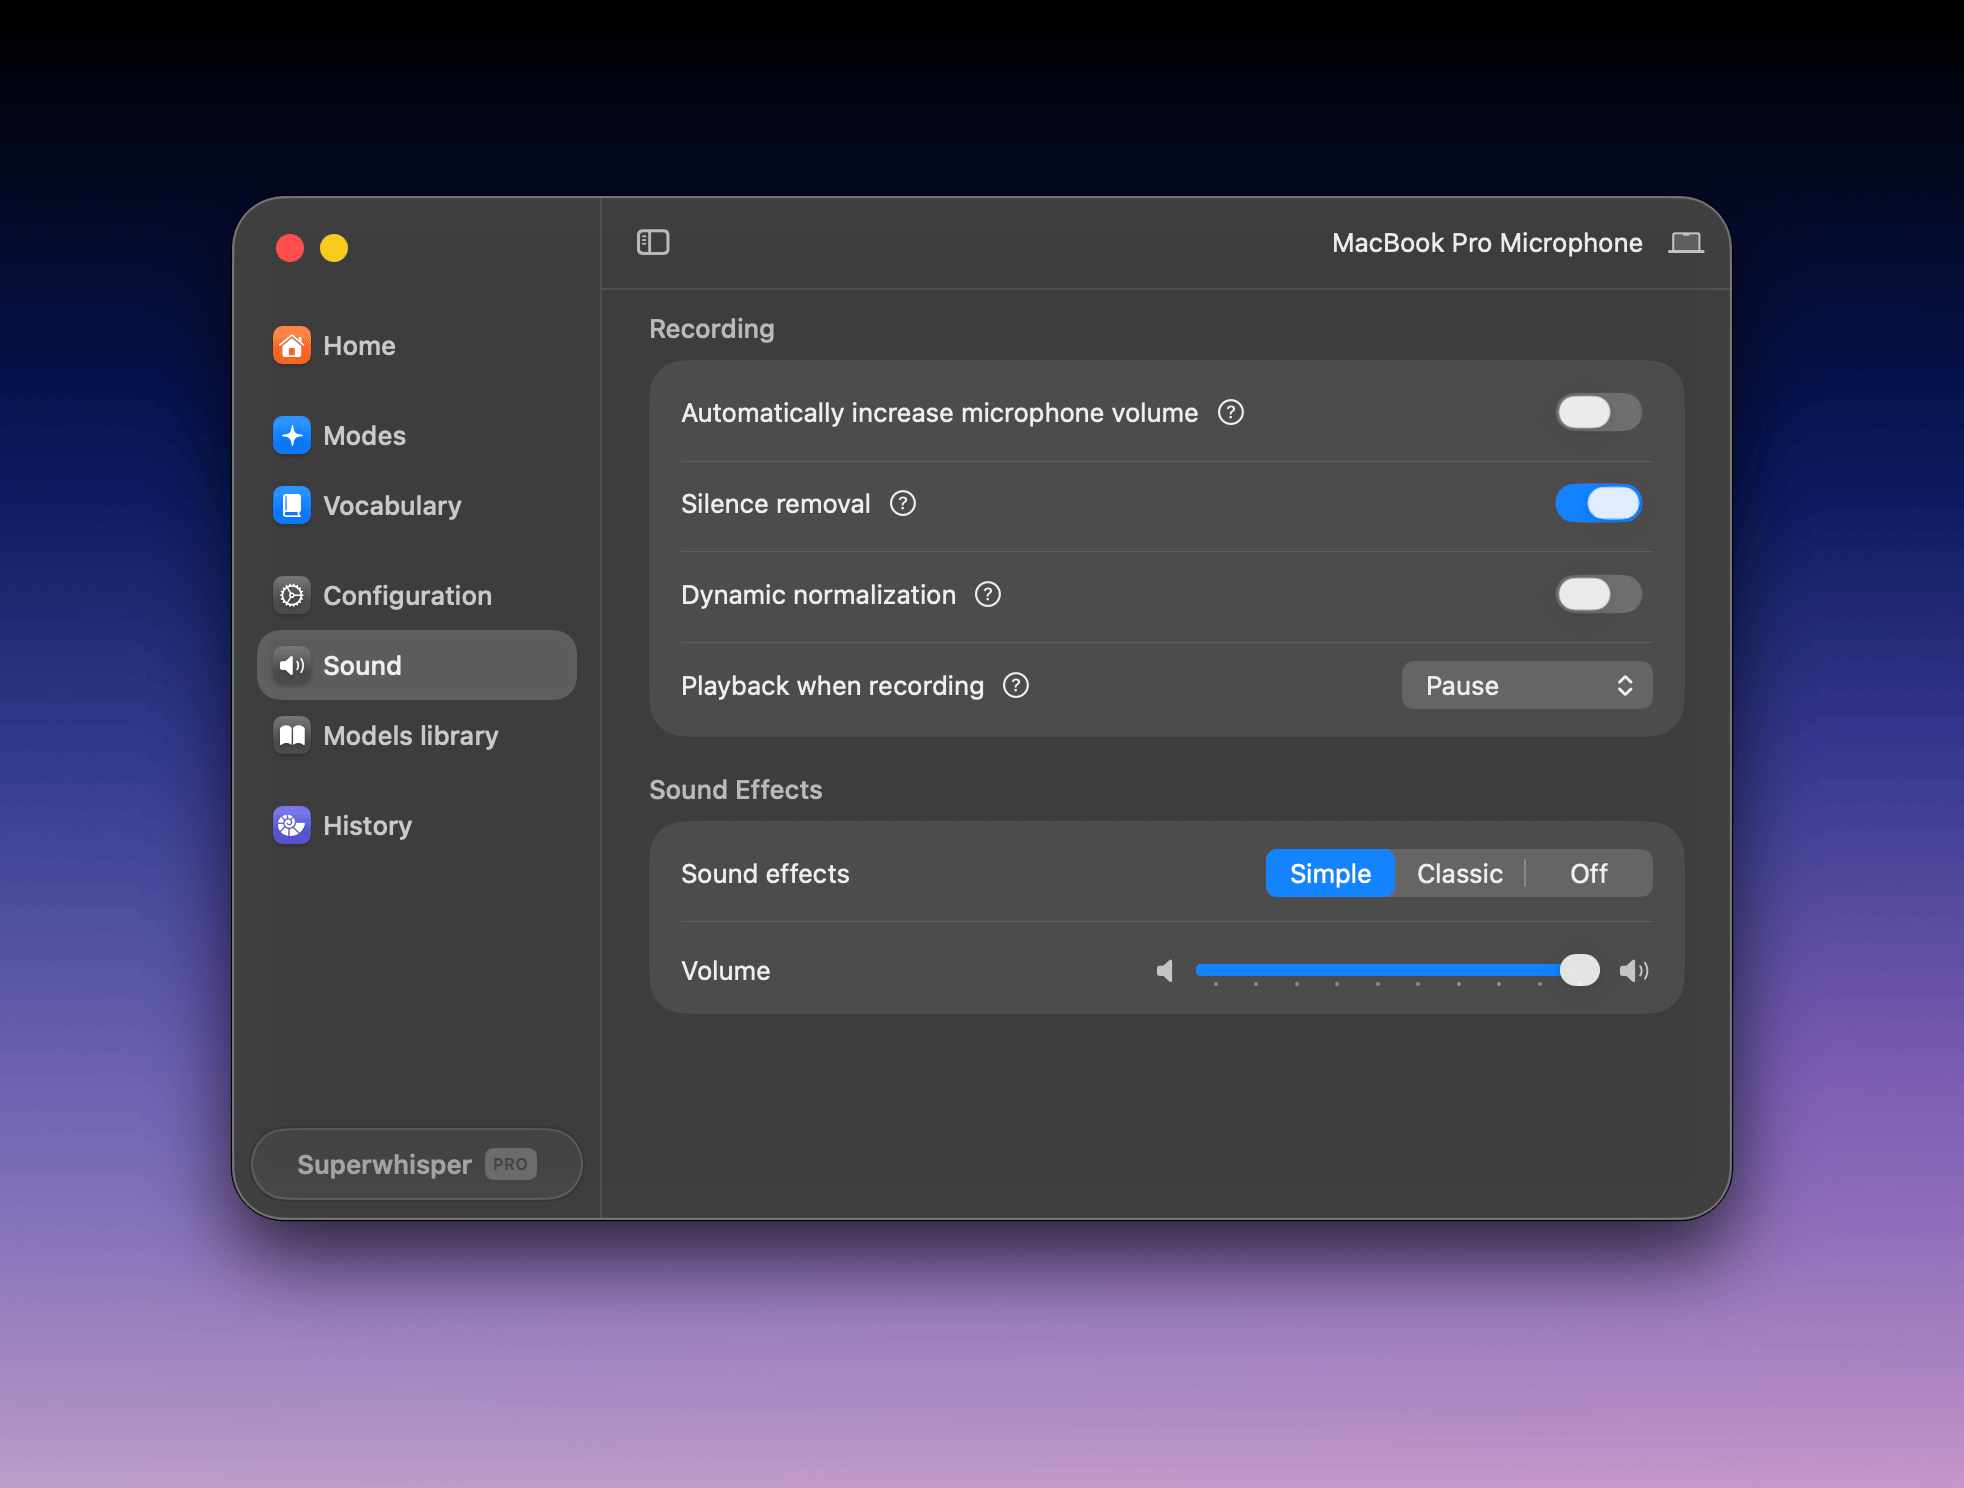 * **Input Device (top right)**: pick a microphone or leave it on automatic to follow the system default. You can also switch input from the [menu bar icon](/docs/get-started/interface-menu-bar).
* **Automatic volume adjustment**: recommended; sets your microphone level for clear recordings.
* **Silence Removal**: recommended; helps prevent hallucinated text during periods of silence.
* **Sound Effects**: adjust the audio cues for recording start and stop. Adjust their volume independently or turn them off.
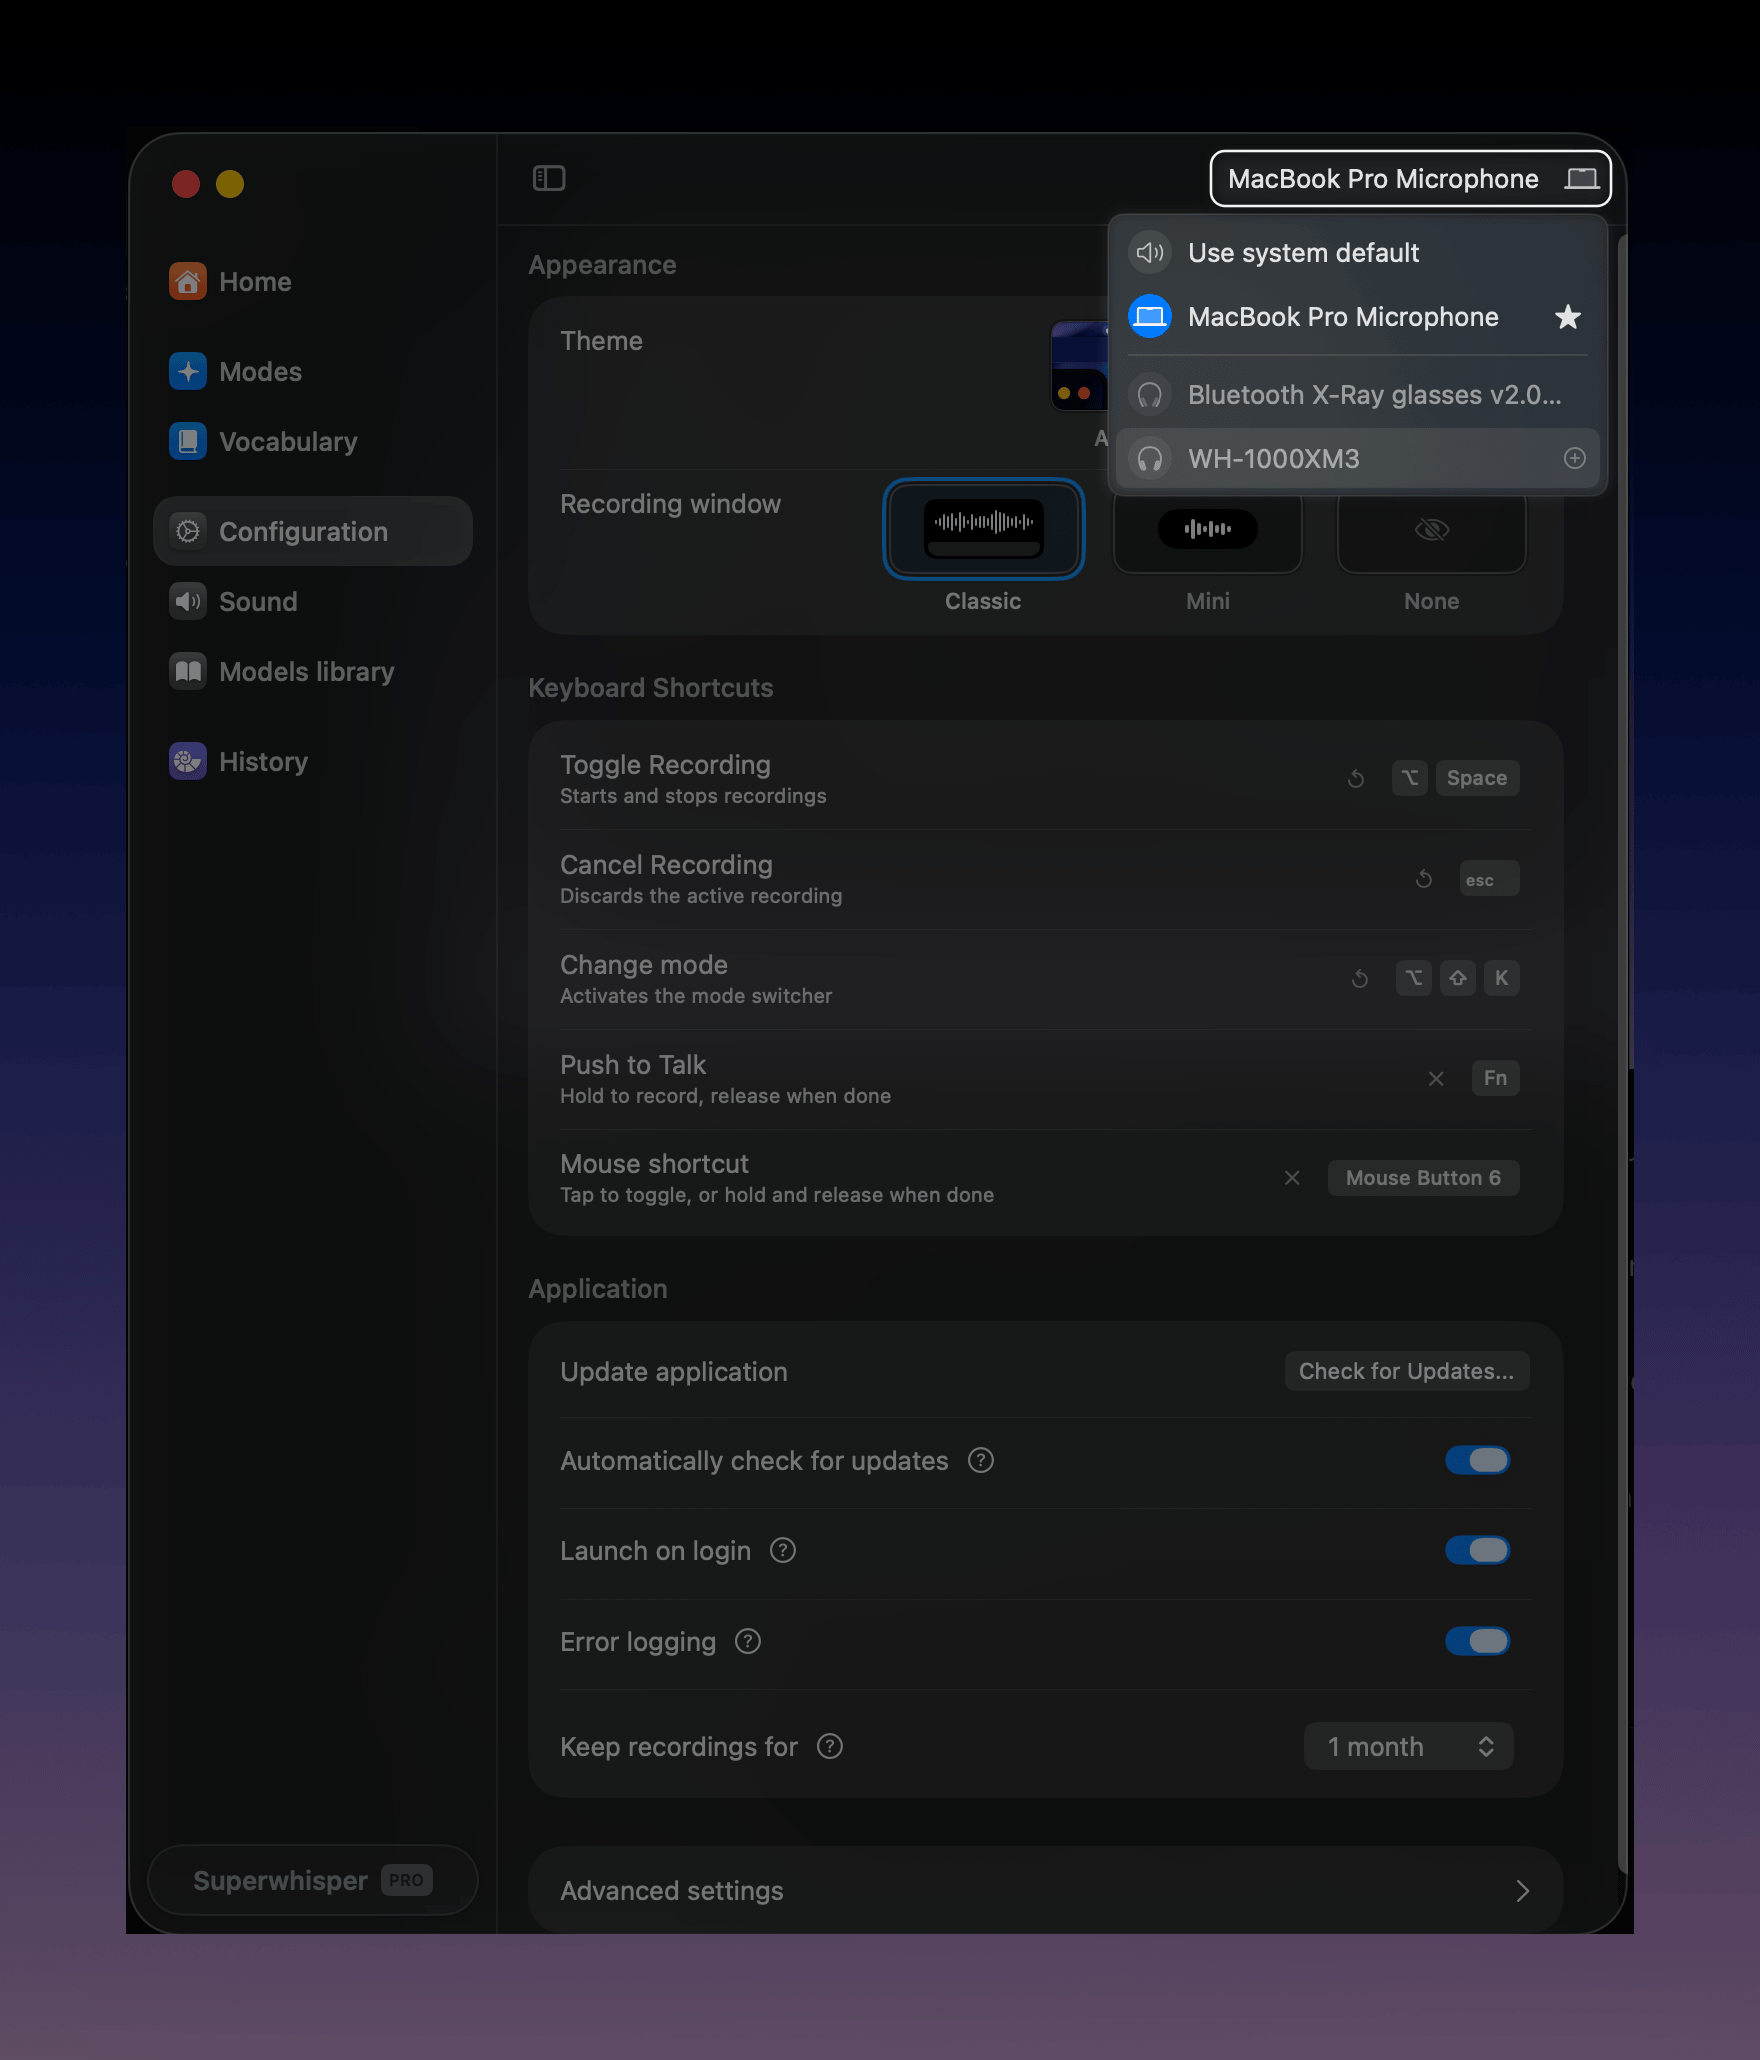
The active input device also shows in the **top-right of every settings pane**. Click it to switch microphones:
* **Input Device (top right)**: pick a microphone or leave it on automatic to follow the system default. You can also switch input from the [menu bar icon](/docs/get-started/interface-menu-bar).
* **Automatic volume adjustment**: recommended; sets your microphone level for clear recordings.
* **Silence Removal**: recommended; helps prevent hallucinated text during periods of silence.
* **Sound Effects**: adjust the audio cues for recording start and stop. Adjust their volume independently or turn them off.
The active input device also shows in the **top-right of every settings pane**. Click it to switch microphones:
 ## More settings
App folder location, FileSync, interface customization, clipboard behavior, and other power-user options.
## More settings
App folder location, FileSync, interface customization, clipboard behavior, and other power-user options.